반응형
# 실행환경 : vscode, mingw32
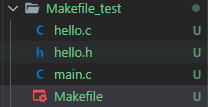
1. 실행할 프로젝트 생성
// hello.h
#include <stdio.h>

void print_hello();
// hello.c
#include "hello.h"
void print_hello()
{
printf("Hello!!!\n");
}// main.c
#include <stdio.h>
#include "hello.h"
int main()
{
print_hello();
return 0;
}# Makefile
CC = gcc
CFLAGS = -c -g
LDFLAGS =
OBJECTS = main.o hello.o
run: all
program
all: program
program : $(OBJECTS)
$(CC) $(LDFLAGS) -o program $(OBJECTS)
main.o : main.c
$(CC) $(CFLAGS) main.c
hello.o : hello.c
$(CC) $(CFLAGS) hello.c
clean:
rm -f *.o\
.PHONY: all bonus clean fclean re
2. task.json 파일 설정
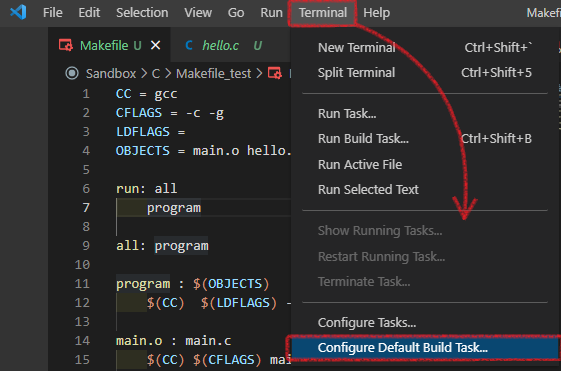
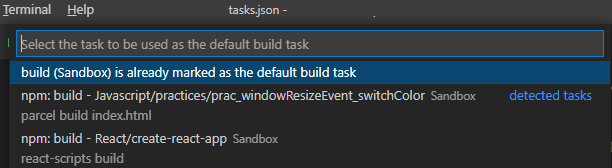
Configure Default Build Task 클릭 후, task.json 새로 생성하기.
생성 버튼이 없으면 출력되는 리스트 중에서 아무거나 눌러도 됨. 🤷♂️
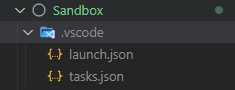
그러면 repository 최상위 경로에 .vscode/tasks.json 파일이 생성된다.
task.json 파일을 열어 다음과 같이 수정.
{
	// See https://go.microsoft.com/fwlink/?LinkId=733558
	// for the documentation about the tasks.json format
	"version": "2.0.0",
	"tasks": [
		{
			"label": "build",
			"type": "shell",
			"command": "mingw32-make",
			"group": {
				"kind": "build",
				"isDefault": true
			}
		}
	]
}
설정 끝.
3. make 실행하기
실행하려는 Makefile의 경로에서 Terminal 실행.
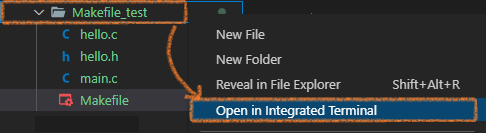
디렉토리 우클릭 후, Open in Integrated Terminal 클릭하면 터미널이 열린다.
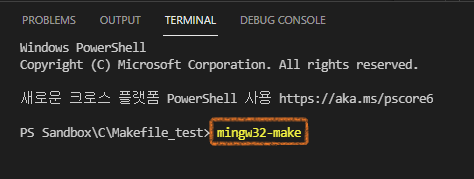
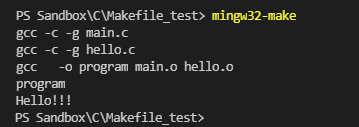
터미널에 mingw32-make 입력후 실행하면 다음과 같이 make가 작동하는 것을 볼 수 있다.

Makefile의 작성 방법은 추후 업로드 예정.
반응형
'Dev > C, C++' 카테고리의 다른 글
| [ C ] 포인터 변수가 가리키는 문자열 또는 배열의 길이 구하기 (2) | 2021.12.26 |
|---|---|
| [ C, C++ ] malloc 캐스팅 왜 안 해도 되는지 관련 글 링크 (0) | 2021.10.18 |
| [ C ] char 포인터가 malloc으로 할당된 메모리보다 더 많은 데이터를 저장하는 이유 (1) | 2021.10.18 |